
Many homeowners dream of handling their own repairs and renovations. The desire for self-reliance and cost savings drives this interest in home improvement projects. You don’t need formal training to become capable around your house.
Starting with simple tasks builds confidence naturally. Each completed project serves as a foundation for more complex work. This approach makes the process manageable and rewarding.
The journey toward home maintenance mastery unfolds gradually. Small successes lead to greater competency. With the right guidance, anyone can develop these valuable capabilities.
This comprehensive guide provides a clear roadmap for building your abilities. You’ll discover fundamental concepts and essential techniques. Safety considerations and expert insights will make your progress efficient.
Following these strategies transforms beginners into confident homeowners. Routine repairs and creative upgrades become achievable goals. The satisfaction of personalizing your living space with your own hands awaits.
Key Takeaways
- Home improvement mastery develops through consistent practice and small project successes
- Beginning with simple tasks builds essential confidence for more complex work
- Self-reliance in home maintenance leads to significant cost savings over time
- Proper guidance and safety knowledge make the learning process more efficient
- Each completed project serves as a stepping stone to greater competency
- Personal satisfaction comes from maintaining and customizing your living space
- A structured approach transforms beginners into capable homeowners
Introduction to DIY and the Path to Self-Reliance
The decision to personally manage home projects marks a significant shift in homeownership. This approach goes far beyond simple cost savings to encompass creative expression and personal pride.
Hands-on home care creates a more engaged relationship with your living environment. You begin understanding how household systems function. This knowledge lets you respond quickly to issues and customize your space.
Many individuals experience a meaningful perspective change through this process. They transform from service consumers into capable problem-solvers. Practical knowledge becomes your most valuable tool for home management.
Building self-reliance develops gradually through project experience. Each task completed adds to your foundation of understanding. Both successes and mistakes contribute to your growing capability.
| Homeowner Approach | Relationship with Home | Problem-Solving Style | Long-Term Outcome |
|---|---|---|---|
| Service-Dependent | Passive occupant | External solutions | Recurring costs |
| Hands-On Involvement | Active participant | Internal capability | Growing confidence |
| Mixed Approach | Selective engagement | Balanced solutions | Controlled expenses |
This foundation establishes why developing these capabilities matters for modern living. The following sections provide specific techniques to begin your journey.
Fundamentals of Learning DIY Skills Over Time
The journey toward home improvement proficiency starts with grasping essential concepts that form a solid foundation. You don’t need formal training to begin making meaningful progress around your house.
Understanding the Basics of DIY Projects
Building practical abilities begins with accessible resources. Online tutorials and community workshops provide excellent starting points. These platforms break complex tasks into manageable steps.
Starting with small projects builds confidence naturally. Each completed task reinforces your growing capabilities. This approach prevents feeling overwhelmed while ensuring steady progress.
Benefits of Developing DIY Competency
The advantages extend far beyond immediate cost savings. You gain independence from contractor schedules and develop faster problem-solving responses. Personal satisfaction comes from mastering household maintenance.
Your home’s value increases with proper care and improvements. Trial and error on minor tasks creates a safe environment for growth. Each experience contributes to your expanding expertise.
This methodical approach transforms beginners into capable homeowners. Practical knowledge becomes your most valuable asset for maintaining your living space effectively.
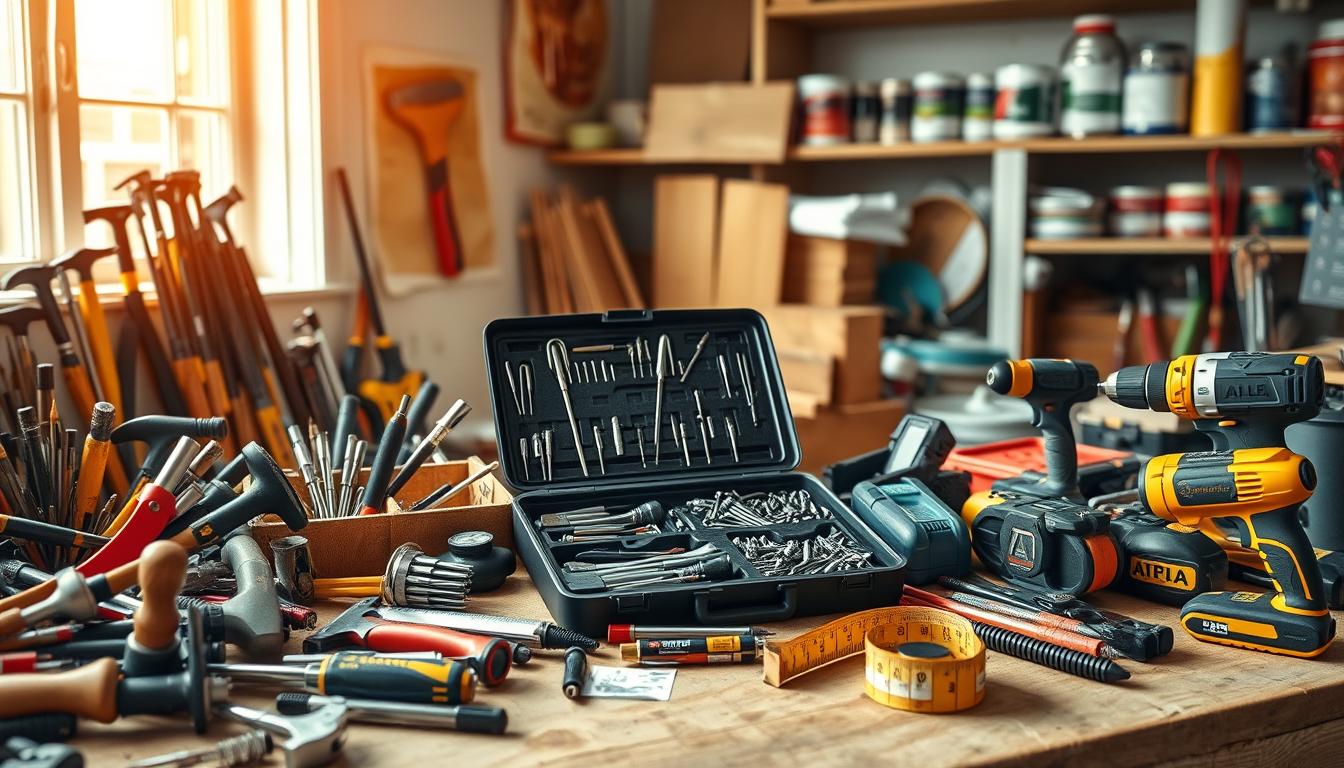
Essential Home Improvement Tools and Materials
The quality of your home projects often depends on having proper tools at your disposal. Starting with fundamental equipment ensures you can handle common household tasks effectively. This foundation grows as your experience expands.
Building your collection begins with core implements that serve multiple purposes. These basic tools form the backbone of any homeowner’s toolkit.
Starter Toolkits and Must-Have Equipment
A hammer, screwdrivers, and tape measure handle numerous everyday jobs. Pliers and an adjustable wrench complete your initial set for routine fixes.
Power tools like a cordless drill dramatically increase your capabilities. Sanders and jigsaws enable more ambitious woodworking projects when you’re ready.
Specialized collections serve specific purposes around your home. Painting supplies create professional finishes while plumbing tools address leaks efficiently.
Safety Gear and Maintenance of Tools
Protective equipment represents a non-negotiable investment for safe work. Gloves, goggles, and dust masks prevent injuries during various tasks.
Practical tips for tool care extend their lifespan significantly. Clean implements after use and store them in dry locations.
Quality equipment may cost more initially but delivers better performance. Proper maintenance ensures your basic tools remain reliable for years.
Finding Wall Studs and Using Anchors: A Practical Guide
Mounting heavy objects securely requires understanding your wall’s hidden framework. Studs provide the structural backbone that supports your entire house. Proper installation prevents damage and ensures safety.
Before hanging shelves or artwork, locate these essential supports. This fundamental skill protects your walls from unnecessary damage.
Effective Techniques for Locating Wall Studs
Electronic stud finders offer the most reliable way to detect wooden beams behind drywall. These tools sense density changes within the wall structure.
The traditional tapping method also works effectively. Listen for solid sounds versus hollow echoes. Mark positions clearly with a pencil once located.
Start your search approximately 16 inches from any corner. This follows standard stud spacing in most homes. Verify your findings at multiple heights for accuracy.
Choosing and Installing the Right Anchors
When studs aren’t positioned where needed, wall anchors provide the solution. They distribute weight across a larger surface area.
Select anchors based on your wall material and weight requirements. Plastic expansion anchors handle light loads effectively. Toggle bolts support heavier items securely.
Drill pilot holes of the correct diameter before installation. Insert anchors flush with the wall surface. This technique ensures maximum holding strength for mounted things.
Following these practical tips keeps your walls intact while providing stable support. Master these fundamentals for confident home customization.
Repairing Drywall, Fixing Faucets, and Unclogging Drains
Common household issues like wall damage and clogged drains occur regularly in most homes. These practical tasks around the house build confidence through successful resolution. Mastering these repairs saves money and develops valuable maintenance capabilities.
Patching Drywall and Repairing Holes
Minor damage to walls happens from everyday living. A misplaced nail or doorknob bump creates small holes that need attention. The repair process is straightforward and delivers professional results.
Clean the damaged area thoroughly to remove dust and debris. Apply spackle or joint compound with a putty knife, spreading evenly to fill completely. Allow adequate drying time before sanding smooth.
Use fine-grit sandpaper until the repair blends seamlessly with surrounding walls. Finish with matching paint for invisible results. With a bit of practice, you can make walls look completely renewed.
Eco-Friendly Methods for Clearing Clogs
Clogged drains don’t require expensive plumber visits or harsh chemicals. Eco-friendly methods using household items work effectively. They protect your plumbing system while being environmentally safe.
The baking soda and vinegar method breaks down grease and grime naturally. Pour half a cup of baking soda down the drain followed by half a cup of vinegar. Let the chemical reaction work for 10-15 minutes before flushing with boiling water.
For stubborn sink clogs, use a drain snake or plunger for mechanical action. Regular preventative maintenance keeps your drain systems flowing freely. These fundamental tasks address common problems quickly and economically.
Painting Walls and Applying Wallpaper like a Pro
A fresh coat of paint or new wallpaper delivers one of the most dramatic visual changes you can make to your home. This type of project can completely refresh a room or space, offering almost instant gratification for your efforts.
Expert Josh McGrath from Better Homes and Gardens Real Estate Central highlights the appeal.
“It’s beginner-friendly and has almost instant gratification—unless you hate taping,” he says.
He also notes that professional results stem from diligent preparation. The real work happens before the brush ever touches the wall.
Preparation: Cleaning, Sanding, and Priming
Success begins with a perfectly prepared surface. Clean walls thoroughly to remove dust and grease. Sand any rough spots until smooth.
Fill holes and cracks with spackle for a flawless base. Applying primer is crucial over dark colors or new drywall. This step ensures better adhesion and true color vibrancy.
Tools and Techniques for a Flawless Finish
Use painter’s tape to protect trim and edges. Cover floors with drop cloths to keep your space clean. A quality angled brush creates sharp lines in corners.
Rollers efficiently cover large wall areas. Apply multiple thin coats instead of one thick layer. This technique prevents drips and delivers a smooth, professional finish.
For wallpaper, precision is paramount. Ensure surfaces are smooth and measurements exact. Carefully match patterns before application for a stunning result.
| Aspect | Painting | Wallpapering |
|---|---|---|
| Primary Skill | Consistent application | Pattern matching & alignment |
| Key Tool | Angled brush & roller | Smoothing tool & utility knife |
| Preparation Focus | Smooth, clean surface | Perfectly measured & pasted surface |
| Best For | Quick color changes | Adding complex patterns & texture |
Safe Use of Power Tools and Mastering Basic Carpentry
Mastering basic carpentry opens doors to creating custom pieces that perfectly fit your living space. This capability transforms how you approach home improvements and repairs.
Power Tool Safety and Handling
Essential power tools like the cordless drill, sander, and jigsaw dramatically increase your efficiency. Always wear protective goggles, gloves, and ear protection when operating these devices.
Maintain a well-lit, clutter-free workspace to prevent accidents. Secure materials with clamps before drilling or cutting. Unplug tools when changing drill bits or blades for maximum safety.
Fundamental Carpentry Techniques
Accurate measuring forms the foundation of successful wood projects. Use a tape measure and speed square while following the principle “measure twice, cut once.”
Practice cutting wood with hand saws or circular saws for clean results. Smooth rough edges with sandpaper for professional finishes. Understanding how wood behaves helps create durable furniture.
Join pieces using screws, nails, or wood glue depending on your project’s needs. These fundamental techniques enable confident creation of custom storage solutions and decorative items.
Brighten Your Space: Replacing Light Fixtures and Switches
Upgrading your home’s lighting represents one of the most impactful changes you can make to enhance both functionality and atmosphere. These electrical tasks deliver immediate visual improvements while building your confidence with safe installation practices.

Light switches experience constant use throughout their lifespan. When they begin to malfunction, replacement becomes necessary for maintaining convenience and safety in your living environment.
Step-by-Step Guide for Electrical Upgrades
Safety forms the foundation of all electrical work. Always begin by turning off power at the circuit breaker. Use a voltage detector to confirm no current flows through the wires before proceeding.
The proper way to replace a fixture involves careful observation of existing connections. Note how wires connect before removing the old unit. Match colors precisely when installing the new light—black to black, white to white, and ground wires together.
For switch replacement, ensure the new unit matches the old one’s specifications. Check amperage ratings and switch type compatibility. This prevents electrical issues and ensures correct operation within your home’s wiring system.
After securing all connections, restore power at the breaker. Test the fixture or switch to confirm proper function. These rewarding tasks update your space with both practical improvements and decorative flair.
Install Shelving and Create Clever Wall Storage Solutions
Custom shelving installations provide both practical storage solutions and decorative appeal. These projects transform unused vertical areas into organized displays for books, decor, or everyday items.
Begin by planning your shelf placement carefully. Measure twice to ensure even positioning across your wall. Use a level to maintain straight lines during installation.
For maximum stability, locate wall studs and screw brackets directly into them. This approach provides strong support for heavier items. When studs aren’t available, select heavy-duty anchors suitable for your wall material.
Always verify weight limits before loading shelves. Distribute items evenly to prevent sagging or damage. Bookshelves require particular attention due to their substantial weight capacity needs.
Successful installation builds confidence in measuring, drilling, and mounting techniques. Explore easy shelving hacks for creative approaches to common storage challenges.
These practical jobs immediately enhance your living space organization. Well-executed shelving arrangements complement your existing furniture while adding functional capacity.
Preventative Home Maintenance for a Long-Lasting Home
Systematic upkeep extends your home’s lifespan while minimizing unexpected expenses. This approach transforms maintenance from crisis response to predictable routine.
Regular attention to key areas preserves your property’s value and comfort. Small investments of effort yield significant returns in system longevity.
Seasonal Tips and Routine Checks
Establish a maintenance calendar that addresses critical needs throughout the year. Seasonal cleaning prevents major issues before they develop.
Gutter maintenance remains essential for protecting your foundation. Clear debris each spring and fall to avoid water damage. This simple task prevents one of the most common home problems.
Indoor air quality depends on regular filter replacement. Change HVAC filters every 1-3 months for better efficiency. Clean air contributes to both health and energy savings.
Safety checks should never be postponed. Test detectors monthly and replace batteries annually. Inspect plumbing and dryer vents to reduce fire risks.
These maintenance tips create a comprehensive protection strategy. Consistent care ensures your home remains safe and efficient throughout its functional life.
Budget-Friendly Repairs: Caulking, Sealing, and More
Simple sealing techniques offer substantial returns in home comfort and energy efficiency with surprisingly little effort or expense. These maintenance tasks protect your investment while keeping utility bills manageable.
Techniques for Smooth Caulking and Sealing
Proper application begins with surface preparation. Remove old, cracked caulk completely. Clean the area thoroughly and ensure it’s dry before starting.
Cut the tube nozzle at a 45-degree angle for optimal bead control. Apply steady pressure while moving along the gap. Use your finger or a caulking tool to smooth the line.
Josh McGrath emphasizes the importance of technique.
“Learning proper caulking results in smooth, mold-resistant lines,” he notes.
This skill saves money by preventing energy loss and water damage. It’s one task you can confidently handle around house maintenance.
| Caulk Type | Best For | Key Features | Cleanup |
|---|---|---|---|
| Silicone | Bathrooms, kitchens | Waterproof, flexible | Mineral spirits |
| Latex | Trim, dry rooms | Paintable, easy application | Water |
| Acrylic | General purpose | Budget-friendly | Water |
Mastering caulking enhances your home’s appearance and performance. The small investment delivers ongoing benefits throughout your living space.
Integrating Expert Advice and Real-Life DIY Success Stories
Seasoned professionals offer practical wisdom that transforms home improvement efforts. Their guidance helps homeowners avoid common pitfalls while maximizing results.
Insights from Home Reno Pros
Peter Andra highlights the value of starting with familiar tools. “Most people are familiar with screwdrivers and can handle basic functions,” he notes. This foundation supports tasks like assembling furniture or updating hardware.
Josh McGrath emphasizes essential plumbing capabilities. “Basic plumbing, like replacing a faucet, is essential for DIYers,” he says. These jobs save money and prevent waiting for professional service.
“If you can swap out a faucet, you’re golden. Doing this correctly is a big labor saver.”
Toilet repairs represent another valuable skill. Replacing flappers and fill valves addresses common problems efficiently. Understanding basic mechanics makes these plumbing tasks manageable.
Learning from Trial and Error
Andra advises knowing your limits with complex projects. “Save complicated tile work for professionals,” he suggests. Simpler backsplash installations offer better starting points.
Patience proves crucial when expanding your capabilities. “Go slow and take your time on measurements and placement,” Andra recommends. This approach prevents costly rework.
Real-world experience teaches through both successes and mistakes. Small projects like drilling holes or applying oil finishes provide safe learning opportunities. Each attempt builds judgment for future work.
This combination of expert guidance and hands-on practice develops reliable diy skills. You learn which jobs match your current abilities and when to call specialists.
Conclusion
Each successful repair or improvement project contributes to a growing sense of self-reliance and property appreciation. The journey builds confidence for common household jobs while saving money on professional services.
Starting with manageable tasks like basic plumbing or simple repairs provides the best way to get started. Your tool collection and capabilities expand naturally through practice. Safety remains essential throughout every undertaking.
Celebrate small victories and maintain patience during the process. Comprehensive guides offer structured approaches to developing practical abilities. These skills enhance daily life and home ownership satisfaction.
Remember that knowing when to seek professional help demonstrates sound judgment. Every expert began with simple projects. Your growing competence will transform how you approach home maintenance.