
Owning a house means you will face repairs and improvements. These tasks can seem daunting at first. With the right approach, many projects are within your reach. Proper planning makes a big difference in the outcome.
You do not need professional-level skills for many common issues. Basic tools and materials from your local store are often enough. The EPA found that household leaks waste nearly 900 billion gallons of water each year. Problems like worn-out washers or faucet gaskets are relatively straightforward to address yourself.
Considering the time, materials, and tools needed helps ensure success. This approach also helps keep your costs manageable. Tackling these projects can lead to significant savings over hiring a professional for every issue.
Key Takeaways
- Many common household repairs are manageable with basic planning and effort.
- You can achieve success without professional expertise for numerous projects.
- Basic tools and materials from local stores are often sufficient for these tasks.
- Proper planning regarding time and resources is crucial for a good outcome.
- Addressing issues yourself can lead to substantial financial savings over time.
- Common problems, like leaky faucets, have a significant cumulative impact if ignored.
- Setting realistic expectations is key to building confidence in your abilities.
Understanding the Importance of DIY Home Repairs
Every property holder faces the reality of ongoing upkeep and enhancement projects throughout their ownership journey. Knowing when to handle tasks yourself versus calling a professional can be challenging. With proper planning and effort, you might surprise yourself with what you can accomplish.
Developing basic repair skills offers significant financial advantages. Professional service calls often range from $100 to $300, while the same repair might cost only $10-$20 in materials when you do it yourself. This immediate money saving adds up substantially over time.
Beyond cost benefits, learning repairs provides independence from service providers. You can address issues promptly instead of waiting for appointments or paying emergency fees. This proactive approach helps identify potential problems early.
Understanding your house’s systems empowers better decision-making about which repairs to tackle. You’ll know when professional expertise is truly necessary for safety or quality reasons. Building skills is a gradual process—you don’t need to become an expert overnight.
The time investment in learning repairs proves worthwhile when considering scheduling challenges and alternative costs of hiring professionals. Each successful project builds confidence for tackling more complex issues in the future.
Mastering Simple DIY Home Fixes
Developing competence in household maintenance requires a strategic approach to project selection and execution. Begin with straightforward tasks that match your current skill level. This builds confidence while teaching fundamental techniques.
Successful property upkeep follows a natural progression. Start with basic maintenance before tackling complex renovations. Each completed project expands your capabilities for future work.
| Skill Level | Recommended Projects | Tools Needed | Time Commitment |
|---|---|---|---|
| Beginner | Fixing squeaky hinges, patching small holes | Screwdriver, putty knife | 30-60 minutes |
| Intermediate | Replacing fixtures, basic plumbing repairs | Wrench set, pliers | 2-4 hours |
| Advanced | Electrical updates, structural modifications | Specialized equipment | Full day+ |
Proper preparation ensures successful outcomes. Always make sure you understand the complete process before beginning any project. Consult multiple resources like tutorials and manufacturer guides.
Gather all necessary tools and materials beforehand. This prevents interruptions and maintains workflow. Allow extra time for unexpected challenges.
Recognize when to seek additional guidance. Consulting experts doesn’t diminish your accomplishment. It demonstrates smart problem-solving. Initial projects may take longer, but efficiency improves with practice.
Benefits of DIY Home Improvement Projects
When you choose to handle maintenance work yourself rather than outsourcing, you unlock a spectrum of benefits that professional services cannot provide. The financial advantages immediately stand out, but the rewards extend much further.
| Common Issue | DIY Material Cost | Professional Service Cost | Potential Savings |
|---|---|---|---|
| Leaky Faucet | Under $10 | $100-$150 | 90% or more |
| Wall Patching | $10-$15 | $50-$200 | 75-90% |
| Room Painting | $30-$50 | $1,000+ | 95% or more |
Beyond the obvious money savings, each completed task builds your capabilities. These skills compound over time, making future projects easier and more efficient.
You gain complete control over scheduling and quality standards. There’s no waiting for appointments or settling for work that doesn’t meet your expectations.
The satisfaction of solving problems with your own hands creates confidence that transfers to other areas of life.
Regular hands-on maintenance helps you understand your property’s systems better. This knowledge enables early problem detection and informed decisions about when professional help becomes necessary.
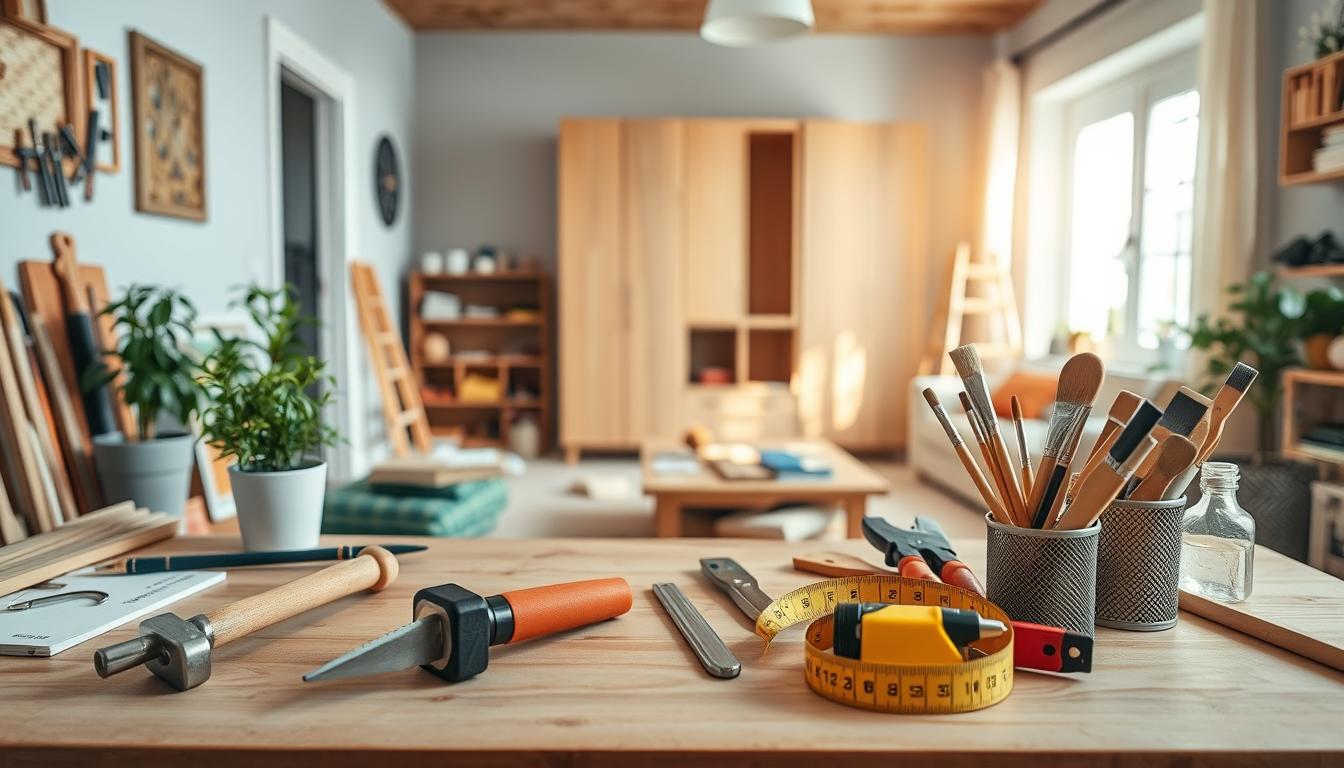
Essential Tools for Successful Home Repairs
Having the right equipment makes all the difference when tackling household maintenance tasks. A basic toolkit containing essential implements allows you to handle most common issues efficiently. Quality tools represent a smart investment that pays for itself quickly.
Your local hardware store carries everything needed for beginner projects. Start with adjustable wrenches, multiple screwdrivers, and basic pliers. These fundamental items handle numerous repair situations effectively.
Hand Tools vs. Power Tools
Manual implements offer excellent value for newcomers. A Phillips-head screwdriver, utility knife, and Allen wrenches accomplish most basic tasks. Hand tools require no power source and store easily.
Electric equipment becomes valuable for larger projects. Consider renting specialized power tools from your hardware supplier initially. This approach saves money while building experience.
Tool Safety and Maintenance
Proper handling ensures both safety and longevity. Always read manufacturer instructions before using any equipment. Wear protective gear like goggles when appropriate.
Regular maintenance keeps your tools functioning optimally. Clean implements after each use and store them in dry conditions. Sharp blades and undamaged components work more effectively.
A small investment in quality basic tools typically ranges from $50-$150. These items serve you reliably for years with proper care. Building your collection gradually makes financial sense.
Fixing Leaky Faucets and Plumbing Issues
The persistent sound of a dripping faucet signals both wasted water and money flowing down the drain. According to EPA findings, household leaks account for nearly 900 billion gallons of water waste annually nationwide.
Most faucet problems stem from worn components like washers, cartridges, or gaskets. These parts cost just a few dollars at your local hardware store.
| Faucet Type | Common Issue | Primary Repair | Tools Required |
|---|---|---|---|
| Compression | Steady drip | Washer replacement | Screwdriver, wrench |
| Cartridge | Handle leakage | Cartridge replacement | Allen wrench, pliers |
| Ball-type | Multiple leaks | Seat and spring kit | Screwdriver, adjustable wrench |
To fix a leaky faucet, first turn off the water supply valve under the sink. Remove the handle using a Phillips-head screwdriver. Extract the worn cartridge or washer and install an identical replacement.
Reassemble the fixture and slowly turn the water back on. Check for leaks around the handle and spout. This basic repair typically takes under an hour.
Properly addressing a dripping faucet can save up to 10,000 gallons of water annually per household.
The financial incentive is compelling—materials cost less than $10 versus $100-$150 for professional service. However, seek expert help for leaks within walls or systemic water pressure issues.
Repairing Doors and Windows
Common door and window problems like squeaky hinges and air leaks can significantly impact your living environment if left unaddressed. These issues affect both comfort and energy efficiency throughout your home.
Addressing these concerns requires minimal investment but delivers substantial benefits. Many solutions use materials already available in most households.
Silencing Squeaky Hinges
Squeaky hinges represent one of the easiest repairs to complete. The noise occurs when metal parts rub together without proper lubrication.
While WD-40 is commonly used, it can attract dirt and darken hinge pins over time. Natural alternatives like petroleum jelly or olive oil work effectively without these drawbacks.
Apply a small amount of lubricant to the hinge pins. Work the door open and closed several times to distribute the solution evenly. This quick fix typically takes under five minutes per door.
Improving Weatherstripping
Weatherstripping prevents drafts around doors and windows, reducing energy costs. Compromised seals allow air infiltration that strains heating and cooling systems.
Check for visible light gaps or feel for air movement to identify problem areas. Self-adhesive foam strips install easily along frames.
Proper sealing also prevents water damage to surrounding structures. This project offers one of the highest returns on investment for household maintenance.
Tightening loose screws in hardware and replacing damaged caulking completes comprehensive door and window care. These measures maintain energy efficiency year-round.
Quick Wall and Drywall Patching Techniques
Wall imperfections like nail holes and minor cracks are among the most common visual issues in any living space. These small damages occur naturally over time but can be addressed efficiently with basic techniques.
The materials needed for this type of repair are readily available at local hardware stores. A small investment in quality supplies ensures professional-looking results.
Covering Nail Holes and Cracks
For small holes and cracks, the process begins with cleaning the damaged area. Use a putty knife to apply spackling paste or joint compound directly into the hole.
| Material Type | Drying Time | Best For | Cost Range |
|---|---|---|---|
| Quick-Setting Compound | 20-90 minutes | Small to medium holes | $5-$10 |
| Standard Spackling | 2-4 hours | Nail holes only | $3-$6 |
| Premixed Joint Compound | 24+ hours | Larger repairs | $8-$15 |
Apply thin layers rather than thick globs to prevent cracking. Feather the edges beyond the damaged area using your putty knife for seamless blending.
After the compound dries completely, sand the surface smooth with fine-grit sandpaper. The repair is now ready for touch-up paint matching your wall color.
This approach costs $10-$15 versus $50-$200 for professional service. Quick-setting compounds allow completion in hours rather than days.
Refreshing Interiors with a DIY Paint Job
A fresh coat of paint delivers one of the most dramatic visual transformations for any interior space. This project requires patience more than specialized skills, making it an excellent starting point.
Thorough preparation is the true secret to a professional-looking finish. Before you open a can, protect your furniture and floor with drop cloths. Apply painter’s tape carefully along trim, windows, and ceilings.
Clean the wall surfaces to ensure proper paint adhesion. Repair any holes in the drywall before you begin. Good prep work saves time and frustration later.
Preparation and Primer Tips
Modern paint products often combine primer and color in one. This simplifies the process for most walls. Using a separate primer is still wise for new drywall or drastic color changes.
| Paint Finish | Best Use Room | Durability |
|---|---|---|
| Flat/Matte | Adult bedrooms, ceilings | Low |
| Eggshell | Living rooms, hallways | Medium |
| Satin | Kitchens, bathrooms, trim | High |
Start by “cutting in”—painting edges with a brush—before using a roller on large areas. Apply paint in a “W” pattern for even coverage. Always let dry completely between coats as directed on the can.
The financial savings are substantial. Materials cost around $75 for an average room. This is a fraction of a professional’s fee. For more paint makeover ideas, visit our resource guide. Properly label and store leftover paint for future touch-ups.
Securing Loose Cabinet Handles and Knobs
Few minor issues detract from a room’s finished look more than loose cabinet hardware. This common problem affects both kitchen and bathroom spaces, making cabinetry feel cheap and poorly maintained.
The root cause typically involves screws working loose through repeated daily use. A quick turn with a screwdriver provides temporary relief. However, the problem often returns unless you take additional steps.
For a permanent solution, consider thread-locking adhesive. Apply just a tiny bit to the screw threads before reinstalling. This prevents future loosening while allowing removal if you decide to replace the hardware later.
When screw holes become enlarged, try this effective trick. Break one or two toothpicks, dip them in wood glue, and insert into the hole. After drying, reinstall the screws into the reinforced opening.
This quick kitchen refresh costs virtually nothing if you have basic tools. The visual improvement far outweighs the minimal effort required. Tight, secure handles instantly elevate your space’s appearance.
While addressing loose hardware, consider whether an update might benefit your cabinetry. New handles represent an inexpensive upgrade that can modernize your entire kitchen aesthetic.
Addressing DIY Electrical and Lighting Fixes
Many homeowners hesitate when facing electrical improvements due to safety concerns. Basic tasks like replacing a light switch or fixture are manageable with proper precautions. Understanding when to call a pro prevents serious hazards.
Electrical safety remains paramount for any repair. Always turn off power at the breaker before starting work. Use a voltage tester to confirm wires are not live.

Replacing Light Fixtures Safely
Changing a light involves straightforward steps when done carefully. First, locate your circuit breaker panel to shut off power. These panels are typically found in garages or basements.
After verifying the electricity is off, disconnect the old fixture’s wires. Match the new fixture’s wire colors precisely—black to black, white to white. Secure the ground wire to the green screw.
The cost difference makes this project worthwhile. DIY materials range from $15-$50 versus $100-$300 for professional service.
| Project Type | DIY Cost | Pro Cost | Safety Level |
|---|---|---|---|
| Switch Replacement | $10-$20 | $100-$150 | High (with precautions) |
| Fixture Installation | $15-$50 | $150-$300 | Medium |
| Dimmer Switch | $15-$40 | $120-$200 | Medium |
Remember that 51,000 home electrical fires occur annually in the United States. For complex wiring issues, always contact a licensed electrician. Check your circuit breakers first when experiencing power problems—often a tripped switch is the simple solution.
Tackling Common Drain and Toilet Repairs
When water starts backing up or toilets refuse to flush properly, many people panic. These common plumbing issues typically have straightforward solutions that don’t require professional help. Understanding the basic mechanics empowers you to address these problems confidently.
Unclogging Drains Without Chemicals
Most toilet malfunctions fall into two categories. Either the toilet won’t flush correctly, or it runs continuously. Both problems usually stem from mechanical failures inside the tank.
A running toilet wastes significant amounts of water daily. The repair involves turning off the water valve at the base. Then flush to empty the tank and replace the worn flapper or fill valve.
For stubborn clogs, try pouring half a cup of dish soap into the bowl. Let it sit for several minutes before plunging. The soap lubricates the blockage for easier removal.
Drain clogs commonly result from accumulated hair and greasy gunk. Chemical cleaners can damage pipes and harm the environment. Natural methods work effectively and safely.
| Repair Type | Materials Needed | Time Required | Cost Savings |
|---|---|---|---|
| Toilet Flapper Replacement | New flapper, adjustable wrench | 20-30 minutes | 80-90% |
| Drain Cleaning | Baking soda, vinegar, boiling water | 15-20 minutes | 100% |
| Fill Valve Replacement | New valve kit, wrench | 30-45 minutes | 85-90% |
Regular maintenance prevents most drain and toilet emergencies before they develop into major problems.
The baking soda and vinegar method clears most drain blockages. Pour half a cup of baking soda followed by half a cup of vinegar. Allow the fizzing reaction to work for 10-15 minutes before flushing with boiling water.
For stubborn clogs, use a drain snake or straightened wire hanger. These tools physically remove hair clumps and accumulated gunk. Restoring proper water flow prevents future issues.
Updating and Touching Up Old Appliances
Kitchen appliances often function perfectly but suffer from cosmetic damage that makes them look dated. Scratches, chips, and finish wear develop over years of use. Specialized products can restore their appearance without replacement.
Spray-on appliance paint works well for small items that don’t generate heat. Brands like Rust-Oleum offer various colors at hardware stores. This approach costs just $5-$10 per can.
For larger or heat-producing appliances, liquid stainless steel paint provides durability. It withstands thermal stress during normal operation. The finish dramatically improves appearance.
| Appliance Type | Recommended Product | Average Cost | Application Time |
|---|---|---|---|
| Small countertop items | Spray appliance paint | $5-$10 | 30 minutes |
| Large heat-producing units | Liquid stainless steel paint | $15-$30 | 2-3 hours |
| Stainless steel surfaces | Polishing compound | $8-$15 | 45 minutes |
Buff out scratches on stainless steel using fine sandpaper. Follow with metal polishing compound. Rub in the direction of the steel’s grain for best results.
Color-matched epoxy touch-up paint handles chips up to 1/4-inch diameter. These specialty products make damage nearly invisible. Find them through appliance parts suppliers.
An unexpected tip involves using automotive car wax on stainless steel. It creates a protective barrier against fingerprints. This makes future cleaning easier many times.
These cosmetic improvements extend appliance lifespan significantly. The low cost makes them attractive compared to replacement. You can refresh your home’s look for minimal investment.
Maintaining Your Home with Preventative Repairs
Regular home inspections catch minor issues before they escalate into major financial burdens. This proactive approach saves significant time and money over reactive fixes. Preventative maintenance ensures your property remains in optimal condition year-round.
Regular Checkups and Upkeep
Gutter cleaning represents essential seasonal maintenance. Clear debris to maintain proper water flow away from your foundation. Make sure downspouts direct water at least five feet from the house.
Deck maintenance requires regular attention to prevent weather damage. Inspect for loose screws and warped boards each season. Addressing these small repairs extends your deck’s lifespan significantly.
HVAC system efficiency depends on regular filter changes. Follow manufacturer guidelines based on filter thickness. Homes with pets may need more frequent replacements.
Floor care prevents long-term damage from developing. Address squeaks promptly and clean spills immediately. Remove old wax buildup to maintain surface integrity.
Establishing quarterly walk-throughs helps identify potential problems early. This consistent attention prevents minor issues from becoming major headaches. Your investment in regular upkeep pays dividends in avoided emergency repairs.
Knowing When to Call a Professional
Recognizing the boundaries of your repair skills protects both your wallet and your well-being. Some projects require specialized knowledge that ensures safety and proper completion. Understanding these limits prevents costly mistakes.
Identifying Complex Repairs
Foundation issues demand structural engineers rather than personal attempts. Electrical work beyond basic switches needs licensed experts due to fire risks. Gas leaks require immediate professional attention for safety.
HVAC systems contain complex components that certified specialists should handle. Major plumbing projects can cause significant water damage if done incorrectly. Asbestos removal requires trained professionals to prevent health hazards.
| Project Type | DIY Risk Level | Professional Necessity |
|---|---|---|
| Foundation Work | Very High | Essential |
| Electrical Upgrades | High | Strongly Recommended |
| Gas Line Repairs | Extreme | Mandatory |
| Tree Removal | High | Advised |
Exterior painting and window replacement seem straightforward but require specific skills. Poor installation leads to energy loss and potential damage. Load-bearing wall modifications need professional assessment.
Calling experts for complex projects demonstrates smart judgment rather than admitting defeat.
Warranty considerations also impact your decision. Many manufacturers void coverage if unauthorized repairs occur. This protection loss can result in substantial future costs.
Conclusion
The journey toward home maintenance mastery begins with recognizing your current capabilities. Each successful project builds confidence while developing practical skills that save money over time.
Financial planning remains crucial for any maintenance approach. Small repairs typically fit within household budgets, while major improvements might benefit from home improvement loans. These often offer fixed rates lower than credit cards.
Remember that consulting professionals for complex things demonstrates wisdom rather than inadequacy. This balanced approach ensures safety while maximizing your home‘s long-term value.
Start with manageable tasks and gradually expand your capabilities. The satisfaction of maintaining your property creates both immediate benefits and lasting empowerment.